Printfriendly

Showing posts with label Canning and Preserves. Show all posts

Sunday, June 22, 2014

Low Sugar Rhubarb Cherry Jam

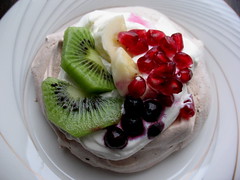
It's been awhile since I wrote last. No reason, really; I'm still cooking a lot, but somehow none of it made it here. Honestly, I'm not really sure why. Let's fix that shall we?

Some time ago, my friend Alexis began posting about Pomona's pectin. I had trekked out to Alexis's house last year to teach her how to make jam and while it was gloriously fun, Alexis pointed out how much sugar my typical recipe had and that she strived to make one less sugary. Time passed, and then she found Pomona's Universal Pectin.

pectin

Pomona's is a citrus pectin which allows you to make jam and jellies with only a fraction of the amount of sugar that you would have to use with other leading pectins. With a husband who is very conscious about his sugar intake, I thought I would give this product a test drive and see how things turn out.

With memories of that really tasty rhubarb cherry crumble, I wanted to use up the rest of the rhubarb in my freezer by turning it into a jam. Superstore has some really great frozen cherries which I picked up, and I found a really amazing recipe that I just had to try. After being a jam maker for years, I found that the end result is really delicious-like pureed fruit on your toast rather than a sugary syrupy version, but for what you gain in flavour you do lose a little in texture. The jam made with Pomona's is more jello-like than a soft set, but I don't mind. The flavour is really all I cared about.

First of all, before you start this recipe you need to make calcium water with powder in a small packet and water. Shake it up in a Mason jar and store in the fridge.

calcium water


Ingredients:

2 1/4 cups sugar
3 tsp Pomona's Universal Pectin
6 cups diced rhubarb
1/2 vanilla bean
2 cups fresh or frozen pitted cherries, thawed
zest and juice from one lemon
4 tsp calcium water
2 tbsp Grand Marnier

Directions:

Prepare your kitchen for canning; this means getting the water bath canner going so it's good and hot. Sterilize your mason jars and have all your equipment ready to start canning. (see how to do that here)

Combine the rhubarb and vanilla bean together with 1/2 cup water in a medium saucepan. Bring it to a boil, then turn down the heat and let it bubble away until the rhubarb has started to break down. This should take about 10 minutes or so. Let it cool a bit and set aside. You should have 3 cups.

In a food processor or blender, puree the cherries. If they are fresh you need to pit them first-you can use a cherry pitter (use it over the sink or outside), or here's some other interesting methods! In the end you should have 1 cup of cherries.

Whisk the sugar and pectin together in a bowl. Set aside.

Fish the vanilla bean out of the rhubarb. Measure out three cups of the rhubarb and one cup of the cherries, and mix them together in a bowl. Pour them both back into a saucepan and stir in the lemon zest, lemon juice, and calcium water. Bring the mixture to a boil over medium heat, stirring. Once it's boiling, add the sugar and pectin. Bring it back to a boil while constantly stirring and let it boil hard for 1 minute.

Take the jam off the heat and add the Grand Marnier. Ladle the hot jam into hot, sterilized jars and top with lids (remember to have the snap tops warmed up and everything). Process in your boiling water canner for about 10 minutes.

Makes about five 250 ml jars of jam, possibly with a bit left over to enjoy right away.

jammy bun

Adapted from Serious Eats


Read More

Monday, December 23, 2013

Cranberry Orange Compote

This place has been quiet, hasn't it? I've been here, there, and everywhere-cooking and writing, working and sleeping.

Well. Mostly cooking and sleeping. Light is a pain this time of year you know, and by the time I rush home from work and try to madly snap a few photos before it's too dark, usually they come out a little strange. Or poorly lit. Or both.

Nevermind, you say, where's the food? Well. There are some things I wrote over at BC Eggs that I want to show you...

banana french toastChocolate Pavlova

Banana rum French toast and chocolate pavlovas to be exact, which are fantastic for Christmas when you need a little food inspiration. You probably already have everything in your house and they are both so easy you'll wonder why you didn't think of them before. I used to think that meringues and things were so hard to make, but once I started teaching myself how to really make them, they aren't hard at all. You can it!

If you are still baking cookies, there are also some super fudgy and rich brownie batter cookies, or spiced molasses ginger cookies that are so easy you don't even need to dig out the mixer. I have written about how to host a really great brunch, a bit about the history of eggnog, and last minute gifts for the chef or egg lover in your life.

It's been busy over there. In the meantime, I also made this wonderful cranberry orange compote that is not only delicious (we are going to slather it over a wheel of brie and bake it tomorrow night). I gave some to co-workers as well. You can put it on pancakes, turkey, and more! This is a really great hostess gift to bring and it's super easy-just put everything in a pot and simmer.

Cranberry orange compote


Ingredients:

5-6 mandarin oranges
2 small lemons
2 cups cranberries
4 cups sugar
1 tsp cinnamon
1 cup raisins
1/4 tsp allspice
1/2 cup chopped pecans

Directions:

In a large pot, combine the sugar, cranberries cinnamon, raisins, allspice, and pecans. Zest the oranges and lemons right over top. Peel the fruit and slice it up into chunks, then place in a food processor to pulse until slightly chunky. Watch out for the seeds in the lemons, you may want to fish those out.

Tips the pulsed fruit into the pot with everything else and bring to a boil over medium heat. Turn the heat down and let the mixture bubble away for about 15-20 minutes, while the cranberries cook down a bit and pop, and the mixture thickens slightly. Don't worry, it will thicken more as it cools.

Divide the mixture between six 250 ml mason jars and screw on a clean lid. You aren't going to can these to seal them, but the jars make it easier to store or give away. Cool the jars and store in the fridge for a month, or in the freezer for about 6 months.

Adapted from Dinner With Julie


Do you like cranberries? You may also like:

Sugared Cranberries

Cranberry Crumble Bars


Read More

Monday, August 12, 2013

Cherry Vanilla Jam

When I was a little kid living in a small town in central BC, summers meant swimming in the lake, camping, playing in the field behind our house, and gigantic flats of fruit. My parents would make stops at Okanagan fruit stands on the way home from a day trip to Kamloops, and we'd load up the car with piles of peaches, berries, cherries, or tomatoes for my Mom to can, freeze, or make jam out of.

Living in 100 Mile House meant we didn't have a lot of access to large grocery stores, so many people canned, hunted, fished, and grew their own food to save a little money and to have things accessible. I remember being a small kid and sitting at the island in our kitchen, knife in hand, coring or slicing strawberries and peaches while Mom bagged them for the freezer, or canned huge jars so that in the winter we'd have peaches to enjoy.

My Mom, as far as I remember, made her own jam. I don't think I ever really ate a lot of store bought jam, and to be honest, once you've had home made it's really difficult to go back. People have this idea that making jam is really hard but honestly, it's not. It's just a bit technical. You really have to follow the directions, and you can't stop part way through or get all "I'm going to do my own thing" with it.

What do you need in order to make your own jam? Go over here and read an article I wrote that tells you what you'll need equipment wise, and gives you some really good tips before you start.

For Christmas last year, I told my husband I wanted a cherry pitter from Lee Valley. In fact I was so insistent that I get one that I drove him to the store and put it in his hand. I liked this one because it's all metal, unlike some cheap versions, and hopefully that means it will last me a very long time. Also, at $11.50 it's super cheap compared to some!

My Lee Valley Cherry Pitter

I LOVE this cherry pitter. Pitting this many cherries without one would be ridiculous and tons of work, but the pitter made things really fast. The only issue is that cherry juice sprays everywhere so unless you want your kitchen to look like a murder scene, you may want to do this outside. Or in a deep sink, while wearing red or an old apron. This is a part of the jam/canning process that you can allow kids to help with, and they will likely find it lots of fun, but you might need to hose them down after. You could set the kids up with a wading pool outside and let them pit the cherries, then put the finished cherries in the fridge until later to make the jam.

On to the recipe! This one is adapted from Bernardin. Certo is the brand I've only ever used and I swear by, but I could only find the Bernardin brand at the store. Before you start any jam making, it's a good idea to open the package of pectin and read the instructions. They usually vary slightly from brand to brand, even if it's basically the same kind of pectin. I prefer liquid just because it's what I'm used to and seems easier than powdered. The insert in each package of pectin will give you tips, tricks, a number to call if you have questions, and give you all kinds of recipes.

This particular jam makes a wonderful spread on toast, and the addition of vanilla gives it almost a cream soda flavor. It would be wonderful as a filling in cookies or cupcakes, in a layer cake, or heated and used as an ice cream topping. If you want to think ahead, try making it in 125 ml jars for Christmas gifts!

Ingredients:

3 3/4 cups pitted, finely chopped cherries  (buy about 2 1/2 lbs. This will give you enough plus some left over for the kids to snack on while they work)
1/4 cup lemon juice
1 vanilla bean, cut in half and seeds scraped out (optional)
7 cups sugar
2 pouches of Bernardin liquid pectin

Equipment:

7 (250 ml) mason jars, or about 4 (500 ml jars)
snap lids and rings for each jar

1. Assemble all your equipment. You will need:

  • canning tongs, for lifting hot jars out of the water
  • lid picker upper (basically a stick with a magnet on the end)
  • space to set very hot jars, and something to protect your counter with. This can be a large cutting board or some old tea towels on a space of counter beside your stove
  • long handled wooden spoon to stir the jam
  • canning funnel
  •  ladle (not metal)
  • 9x13 inch metal cake pan, for putting your jars in (makes it easier to move them around)
  • jars and NEW snap lids. Used rings and jars are ok, but the lids must be new each time
  • canner, with a rack inside and a lid
  • large pot, like a stock pot 
  • mug or cup for your pectin
  • clean, damp, cloth

2. Get your canner about 2/3 - 3/4 full of water, put the lid on, and put it on the stove on high heat so that it can get going before you are ready to make jam. You want it to boil before you proceed, and this may take as long as 20 minutes or more. Once it boils, turn down the heat and move on to #2!

3. Pre-heat your oven on to 225 F. Put your clean jars in a metal 9x13 cake pan and set them in the oven while you continue. This will sterilize the jars. I like using the cake pan because it makes getting the jars in and out of the oven far easier. They need to be in a 225 F oven for at least 10 minutes. I often just put them in and let them hang out there while I make the jam.

4. Get a small saucepan and fill it about 1/2 full of water. Bring it to a simmer. Place your snap lids in it and turn the heat down. You don't want it to boil but you want it to be hot enough to soften the glue on the lids. Take your pouches of pectin, snip off the tops, and set them, open side up, in your mug or cup and set them beside the stove.

5. Pit and chop your cherries. To save yourself some time, use your food processor to chop them and just pulse it until they are finely chopped but not pureed. Measure the chopped fruit into your large pot. Add your sugar, vanilla bean and seeds,  and lemon juice.

**Yes, I know this is a lot of sugar. It's just the nature of jam. Don't reduce the sugar or the recipe won't work. If you don't like this much sugar, then this recipe isn't for you. You can get 'light' versions of pectin, and those may be better for you. **

6. Over medium high heat, begin to heat your jam, stirring as you go. The sugar will liquefy and it will begin to look more like a sauce. This really is the point of no return - once you are HERE, you can't stop and go do something else. Put a TV show on for the kids and tell them to stay out of the kitchen.  Keep stirring and watching the jam until it begins to boil. You want it to get to a full, rolling boil that you can't stir down. Turn the canner on high heat to get it back to a good simmer.

7. Add the pectin directly to the jam. Keep stirring, and boil it hard for 1 minute. Remove from heat. Most recipes say to skim the foam off at this point, but a little foam doesn't bother me that much so I often skip this step. As you can see below, there's a little bit but I don't think it affects the quality of the jam. You can decide.

8. Get your jars out of the oven and set them on the counter beside the stove, on that cutting board or tea towel that you have ready. Fish out the vanilla pods and set aside. Put the funnel on a jar and using a ladle, fill the jars, but be sure to leave 1/2-1/4 inch head space (space from the rim of the jar to the jam. Once all the jars are filled, you need to move fast - wipe the rims of the jars with a clean, damp cloth (careful, it's really hot) and, using the lid picker upper, fish a lid from the hot water and place it directly on the clean jar. Screw on a ring until just finger tip tight. Continue with the next jar.

Cherry Vanilla Jam


9. Once all jars have been filled, rims wiped and they have lids on, carefully lower the jars one by one into your canner with your tongs and crank the heat under the canner to bring it to a boil. The water of the canner needs to cover the top of the jars-and depending on the size of the jars and your canner, this can be a bit tricky. Mine isn't big enough to process 1 liter jars, and only barely big enough for 500 ml ones. I don't get the stated 1 inch of water coverage on the top, it's more like 1/2-3/4 inch. If you don't have enough water, put some in your kettle, bring it to a boil, and add to the pot (don't pour it directly on a jar though)

Tip: adding the jars displaces some of the water and you may find you have too much water in the canner. No problem, grab your ladle and just ladle some right back out into that empty jam pot.

10. Process the jam in the boiling water (put a lid on on the canner, slightly askew) for about 10 minutes. You don't want it to be at a hard boil here, but bubbling. Too many jars and boiling it too hard can cause jars to crack and then you end up with a big mess. When the time is up, gently remove the jars from the canner with your tongs and set them on a cutting board or towel lined counter to cool.

11. You will hear the telltale 'pop' of the lids sealing, sometimes even just as you are removing the jars from the water. The lids will feel loose, but DON'T tighten them. Just leave the jars on your counter to cool. Don't bother to touch them or do anything, just let them sit there.

12. When the jars are cool, check the lids. if they don't have any give, they are sealed and will last about a year. You can take the rings off, or just store them with the rings loosely on the jars. If there is give in the lid, it didn't seal. You need to put the jar in the fridge and use it up.

Sealed jam lasts about a year, if you can go that long without eating it. 


Read More

Wednesday, July 4, 2012

Tequila Pepper Jelly and a Review of Canadian Living's Complete Book of Preserving


I grew up in a small town in Central BC in the 1980s, where there was 1 stoplight and not even a take out pizza joint until I was in grade 10.  Every summer my parents would load up the car with flats of fat, juicy tomatoes, ruby red cherries, and sweet strawberries from fruit stands with their wares trucked up from the Okanogan.  Making jam or canning was a family affair; with us kids sitting at the island in our kitchen knife and cutting board in hand, hulling strawberries or peeling and slicing peaches. 

There’s something about homemade jams and jellies that I just can’t get from buying them at the store.  The lack of additives and colors, fresher fruit, and the freedom to play around with flavors keep you from being limited to what’s on the grocery shelf.  Also, making jam at home is far more economical than buying it once you already own all the canning equipment.

Awhile ago, I was sent this gorgeous new book from Canadian Living.  I’ve often used Canadian Living’s recipes in my kitchen when canning, always with great success. This hardcover book has everything from pickles to mustards, fruit vinegars, jams, chutneys, and more.   This pepper jelly has a fantastic twist with the addition of tequila, and comes out sweet with a bit of spice.  I think it would be tasty on a wheel of brie, slathered over cream cheese on baguette, or as a glaze on chicken.  I don't think you need to worry about the alcohol with young kids; when you add it to the screaming hot jelly, there's much bubbling and I'm sure the alcohol just burns right off, leaving the flavour behind. 

Having said that, when I bought the tequila I was asked not for one, but two pieces of ID at the liquor store.  I'm 41.  Let's just say it made me really, really happy.

If you are new to canning, the book also explains the process well, talks about equipment and tips, and offers recipes for beginners as well as for more advanced cooks. With beautiful photographs and easy to follow directions, I highly recommend that you give it a good look.

IMG_1483


Adapted from Canadian Living

1 cup minced sweet peppers-1/3 cup each red, yellow, and orange.
1 tsp minced hot red pepper, seeded  (I used bird's eye chiles)
¾ cup white wine vinegar
3 cups sugar
¼ cup tequila
1 envelope of liquid Certo

Before you start, sterilize 8 ½ cup sized jars and keep them hot in the oven.  Fill a canner with water and bring it to a boil (this takes awhile, I’d do this first).  You also want to get a small pot and bring the water to a simmer, then set the snap lids in to soften the glue.  Don’t boil them, but keep them in hot water while you continue.

In a large pot, stir together the sweet and hot peppers, vinegar, and sugar.  Bring to a full rolling boil over medium heat, stirring.  Let boil  or 5 minutes while you stir to keep it from burning.

Remove the pot from the heat and add the Certo, stir, and then add the tequila.  The mixture will bubble after you add the tequila, but don’t worry about it.   Set the hot jars onto a tea towel on your counter to catch the spills.

Ladle the hot jelly into the jars, leaving ¼ inch headspace.  A canning funnel and ladle work really well here and keep the mess to a minimum.  Wipe the rims of the  jars with a clean cloth, then cover with a warm snap lid and screw on the band to fingertip tight.

Process the jars in a boiling water canner for 10 minutes.  Turn off the heat and move the canner off the element to let it cool a bit before removing the jars to the counter top.  As they cool, occasionally turn them upside down (carefully!) and leave them that way for a few minutes so that the bits of pepper in the jelly don’t float to the top and stay there.   If you do this every so often as they cool, the bits will eventually be suspended in the jelly quite nicely.


IMG_1485


Allow the jars to completely cool on the counter.  Each of the snap lids should be sealed up-meaning, if you press the top they are firm and there is no give.  Any jar that didn’t seal can be refrigerated and you can use it up immediately.

Makes 3-4 cups of jelly

Disclosure: I have not been paid by, nor do I work for, Canadian Living or their publisher.  The book was sent to me to review.  However, it should be said that some of the recipes in the book have been around for years in their publications, and I have made them before, with great success.   
Read More

Thursday, September 3, 2009

Blueberry Jam

With a bumper crop of blueberries in Richmond this season, it's been easy to get them for a fairly decent price. Usually I don't buy a flat of blueberries, but this year I couldn't resist.

Without enough space in my fridge to just keep adding blueberries, I did what any other canning woman would do-I made jam! I'd forgotten how delicious blueberry jam is. This recipe is straight out of the box of Liquid Certo and yes, it has a lot of sugar. If you would prefer one that is lighter, I did find this recipe on Canadian Living's website. It uses Certo Light instead and 1/3 of the sugar of my recipe. I haven't tried it though so I don't know how it tastes.

4 1/2 cups (about 2 lbs) of blueberries, crushed (so much easier if you pop them in a food processor and give them a whirl. Honest!)
2 Tbsp lemon juice
7 cups of sugar
2 packets of Liquid Certo

Measure the blueberries, lemon juice, and sugar into a large pot. Over medium heat, stir and bring to a boil.

Boil the mixture hard for a full minute, then remove from the heat and stir in both packets of Liquid Certo. Continue to stir for 5 minutes, while the jam cools. Ladle into hot sterilized jars, wipe the rims, and top with prepared Snap Lids, then rings until finger tip tight.

Process in a boiling water canner for 5 minutes. Makes about 5 jars (four 500 ml and one 250 ml).

Read More

Wednesday, September 2, 2009

Apricot Vanilla Jam

This cooked jam has a vanilla bean added, which gives it a deliciously sinful, smooth flavor! Don't worry about the black specks, that's just the vanilla. The original recipe is from inside my packet of Liquid Certo. The idea of adding the vanilla bean is however, all mine.

3 cups of fresh apricots (about 2 lbs); pit, cut into quarters, then chop in food processor.
1/4 cup lemon juice
7 cups sugar
1 pouch liquid Certo
1 vanilla bean

Put the apricots, mango, lemon juice, and sugar in a really large pot. Cut the vanilla bean in half lengthwise, then using a spoon, scrape out the seeds and stir into the sugar/apricot mixture. Put the remaining pods into the mixture as well. Over medium heat, bring the mixture to a boil, stirring constantly so it won't burn.

When the jam begins to boil hard, time it for 1 minute and then remove it from the heat. Discard the vanilla pods. Immediately stir the Certo liquid pectin into the hot jam and stir. Don't worry too much about the foam. Sometimes I skim it off, but I find that it really dies back down when the jam cools a bit.

Allow the jam to cool for 5 minutes, stirring. Ladle into hot jars, wipe the rims, then top with hot snap lids and screw the bands on. Process in a boiling water canner for 5 minutes, then allow to cool to room temperature and store.

Makes approximately four 500 ml jars of jam, but have a few extra jars ready just in case.
Read More

Tuesday, August 25, 2009

How to Can Tomatoes


This morning, these babies beckoned from my kitchen. Thirty pounds of ripe, luscious tomatoes, all waiting to be canned and put away for winter. I love using these in my home made butter chicken, spaghetti sauce, and clam pasta sauce. Heaven. Plus they are so much cheaper, and just better than what you get at the store. I know exactly what is in that jar-and it's not any weird things I can't pronounce, either.

Before you start, fill your canner with water and turn it on so it will be hot when you need it. Put all your jars into the dishwasher and get them good and clean (you will need about 4-5 pint jars for 5 1/2 lbs of tomatoes). Put your snap lids in some hot water, and keep it on low so it stays hot and they are ready to go when you need them. After my jars are clean I put them on a cookie sheet in my oven, set at 250 F to keep them hot.

Have everything on the counter ready to go; a set of jar tongs, screw bands, a magnetic jar picker-upper thing, a ladle, canning funnel, etc.

First you have to peel the tomatoes. That's not hard at all, actually. Just lightly score the bottom, and then dunk them into boiling water until the skin starts to split. Fish them out, and plunge them into cold water.


See? Now the skins just come right off. Go ahead, just peel 'em. Be careful though, they can be juicy. I often do it over a bowl-one bowl for the peels, one for the naked tomatoes.


Now you core them and chop 'em up. This part gets kinda messy. I put an old tea towel under my cutting board to catch the juice, and every 2 or 3 tomatoes I tip the juice on the cutting board into the bowl. Usually I cut each tomato into 4-6 pieces.

Put your sliced tomatoes into a large pot and turn the heat to medium. You want to heat them up just until they start to boil. The ladle them into hot 500 ml/ 1 pint canning jars, leaving about 1/2 inch of space between you tomatoes and the top of the jar. This is important! I leave a bit of extra room, and run the handle of a wooden spoon around the inside to make sure there's no air bubbles. Then I add 1/2 tsp sugar, 1/2 tsp coarse (pickling) salt, and 1 Tbsp lemon juice to EACH pint (500 ml jar).

If there's extra room and I'm not 1/2 inch from the top yet, I top it up with a bit of the juice or tomatoes. Wipe the rims with a clean cloth, top with hot snap lids, then screw on a band until finger tip tight. Place them in your boiling water canner and top up the water until it's covering the jars.


Keep an eye on it, and when you get it back to boiling, time it for 35 minutes. When they are finished, remove the jars to a tea towel on the counter and let them cool. Don't re-tighten the lids!

You will hear popping sounds-that's your lids sealing up! Yay! If any don't seal, after they are cooled to room temperature, stick them in your fridge and use them up over the next few days.

Mmm...now I have 24 jars of tomatoes just waiting in my cupboard, ready to be made into yummy dishes in the middle of winter. I can hardly wait!
Read More

Tuesday, August 11, 2009

Drunken Peaches


So, what do you do with a bunch of fresh peaches and a bottle of rum?

You get them naked and drunk.

NOT the cook, people, the peaches (sheesh, get your minds out of the gutter!) I found a great recipe on Canadian Living's website and decided to try it. If you have never canned peaches before, it's not really for the faint of heart. There weren't a lot of technical directions on how to exactly DO this recipe, so I'll walk you through it.

First, I put all the jars in the dishwasher to get clean and sterilized. I also filled up my canner with water and put that on the stove to get hot. It's always a good idea to have everything out and ready to go before you begin canning.


To peel the peaches, I put a small x in the bottom of each with a sharp knife, then dunked them in boiling water for a minute before plunging them in ice water. The skins come of really easy then. Slice them up. To keep them from browning I tossed them with a bit of lemon juice.


The recipe gets you to make a sugar syrup, and cook the peeled, sliced peaches in it for about 5 minutes. You then pack them into hot jars, top with some rum, and some of the sugary juice. I found that I actually needed more peaches then the recipe called for to fill the 7 jars, and had a lot of juice left over. They were some juicy peaches!

Next you wipe the rims clean, top with hot snap lids and the screw bands, before processing for 20 minutes in a boiling water canner. This part was, for me, the most frustrating. The jars did wonderfully IN the canner, but as soon as I removed them, all the juice boiled and overflowed out of the jars.

Okay, not ALL the juice, but a lot of it. I'm not quite sure what I did wrong. If anyone wants to fill me in, please do! Ever scientific Jake believes that it's the addition of rum that is the culprit.


They all still had lots of juice, AND they all sealed so even though the loss of some liquid was frustrating, it didn't ruin them completely. If you would like to give them a go, here's the recipe! Let me know how it worked for you.
Read More

Tuesday, August 5, 2008

Apricot Syrup

Berry Sundae and Apricot Syrup


I love apricots. I literally wait until they are in the store, and then the first thing I do is buy up a bunch and make jam. Why not eat them raw, you ask? Well, I have something called Oral Allergy Syndrome, which makes eating fresh apricots a bit of an itchy experience.

This recipe is delightful. Syrup is amazing drizzled over pound cake, pancakes, or as in the photo, ice cream. I highly recommend you try it-and with a cute ribbon tied around the jar, it makes a nice teacher gift.

Adapted from Company's Coming Preserves

2 cups of apricots, pitted
1 cup water
2 tbsp lemon juice (fresh or bottled)
4 cups sugar
1 tbsp corn syrup

Pit and chop apricots. In a blender or food processor, puree them with the water. Put into a large pot with the sugar, lemon juice, and and corn syrup.

Cook and stir over medium heat until it begins to boil. Boil for 5 minutes, continuing to stir.

Pour into hot, sterilized jars and seal. Process in a boiling water canner for 5 minutes.

**Please see the Bernardin website for canning instructions
Read More

Tuesday, May 6, 2008

Mango Butter


Once I started making home made jams, I've never been able to go back to store bought. This recipe was found in a wonderful book titled Prizewinning Preserves, by Yvonne Tremblay. I've been drooling over the pages, and already have over a dozen recipes bookmarked!

Sweet, tropical, and oh so delicious, this fruit butter is positively delectable spread on warm baking powder biscuits. Try it; I promise that you won't be disappointed!

4 lb firm ripe mangoes (about 5-6 medium)
1 1/3 cups apple cider, orange juice or water
4 cups sugar
2 tbsp lemon rind
1/3 cup lemon juice

Peel and chop the mangoes, and place in a dutch oven or heavy bottomed pot. Add juice (or cider, water); bring to a boil over high heat. Reduce heat, simmering 15-20 minutes until fruit is very soft, stirring occasionally.

Put the fruit through a food mill, food processor, or even puree it in a blender (which is what I did) until smooth. Return to the dutch oven.

Stir in sugar, lemon rind and juice. Cook over low heat, stirring constantly until the sugar is dissolved. Increase the heat and bring to a boil, stirring constantly. Reduce heat; boil gently for 35-40 minutes or until thickened. (*Basically I planted myself by the stovetop and stirred this very often, making sure that it didn't burn and turning the heat down if I felt it was getting too close to burning). Continue to reduce heat and stir often, especially towards the end of cooking time.

Test for doneness. Basically this means that when you take a spoonful of the fruit butter and set it on a small plate, no liquid should seep out around the edges.

Ladle into sterilized jars to within 1/4 inch of the rim; wipe rims and apply prepared lids and rings; tighten just until fingertip tight.

Process jars in boiling water canner for 10 minutes. Let rest at room temperature until cool. Check seals, and refridgerate any unsealed jars for up to three weeks.

Makes five 250ml jars

Never canned before and need tips on how to sterilize jars and prepare lids? This site has some great information.
Read More

Sunday, July 15, 2007

In A Jam ~ Strawberry, Apricot, and Mango

I had a bunch of mangos sitting around and thought...hmm...why not make jam with them? The results were the best jam I've had in a long time.


Apricot Mango Jam


1 1/2 cups apricots...make sure to pit and either cut them up tiny or pulse in a food processor

1 1/2 cups mango...peeled and chopped in the food processor

1/4 cup lemon juice
7 cups sugar
1 pouch liquid Certo

Put the apricots, mango, lemon juice, and sugar in a really large pot. Bring to a boil, stirring constantly so it won't burn. You shouldn't be able to stir down the boiling...when it gets to that point, let it boil for one minute while you stir.

Remove from the heat and immediately add the Certo. Stir and skim the foam from the top for 5 minutes.

Ladle into hot, sterilized jars. Cover with lids and screw on tightly.


Strawberry Mango Jam

2 cups of mashed strawberries
2 cups mango (pitted, sliced, and chopped in food processor)
1/4 cup lemon juice
7 cups sugar
1 pouch liquid Certo

Put the berries, mango, lemon juice, and sugar in a really large pot. Bring to a boil, stirring constantly so it won't burn. You shouldn't be able to stir down the boiling...when it gets to that point, let it boil for one minute while you stir.

Remove from the heat and immediately add the Certo. Stir and skim the foam from the top for 5 minutes.

Ladle into hot, sterilized jars. Cover with lids and screw on tightly.

**Jars can be sterilized by placing them in a 225F oven for 10 min and keep warm until you fill them. Lids should be kept in boiling water until ready to use. If you forget the process, don't worry. These recipes are pretty much the same as the ones in the Certo box, I just substituted some of the fruit for mango.
Read More
© 2005-2017 all written and photographic content by Scattered Mom/Karen Humphrey (unless otherwise specified) and may not be reproduced or used in any manner without consent. All rights reserved.

© 2014 Chasing Tomatoes, AllRightsReserved.

Designed by ScreenWritersArena